


|
|
|
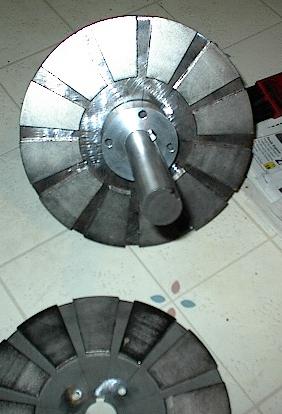
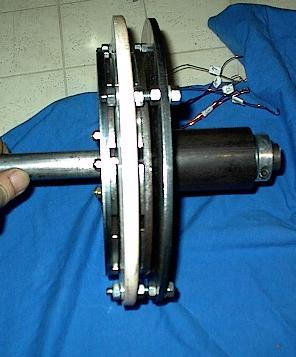
This was one of the projects this summer as a part of upgrading my system. Quite fun although I'm glad the system is back together and completed.... Below shows the 2 magnetic discs using the triangular neodymium magnets listed in my builders corner page. Each disc has 12 magnets on them and are installed face to face. ( Very carefully I might add ). The magnets used are the ones on my Builders Corner page close to the bottom.
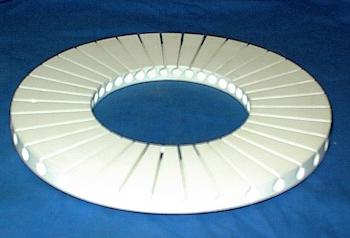
The stator was started by pouring liquid plastic in a mold to form a solid ring. Then it was jigged into a rotary table. 36 holes were drilled in the plastic then the top portion was opened up with a slotting saw to get the wires into the holes...
After all the machining was completed I cut some wooden dowels to slide into the holes. This holds the wire out of the way of the other holes when its time to install the next phase...
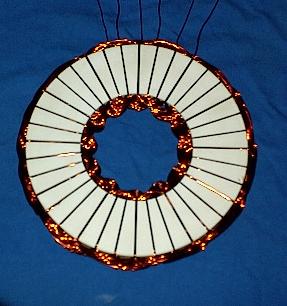
The stator has 36 slots and was wound with 10 turns of #14 wire per coil, since each slot shares 2 coil legs there are 20 wires in each hole. It came in at 0.42 ohm wired in star. The next picture shows the stator wired and ready to place in the mold and fill it full of plastic again making it a solid mass...
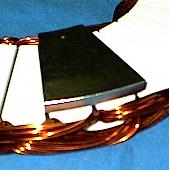
Unfortunately, I didn't take any pictures of the final pouring process or the stator as it came out of the mold. I was in a bit of a hurry at the time and it completely slipped my mind. Below is a picture of the stator wired with a magnet over it showing the placement of the wires in comparison to the magnet...
The next picture show the head assembly together as it was tested in the lathe. The discs are 8" diameter and the stator is mounted to a 10" disc ( the stator was 10" od also). From the front magnet disc to the back of the backing plate measures 2 inches thick. The stator is 0.625 thick itself. A fairly compact unit...
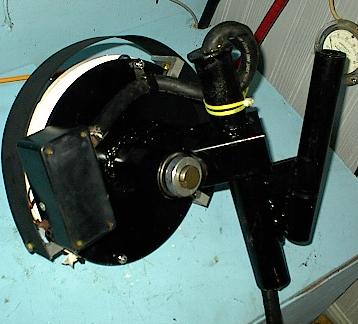
The head assembly just prior to installing the tail and putting it on the tower. I installed a sheet metal shield around the top and sides for those winter days that rain and freeze... hopefully it won't freeze and lock it up. As long as its running its not a problem because the stator stays warm enough to keep the rain from freezing... an untested idea....
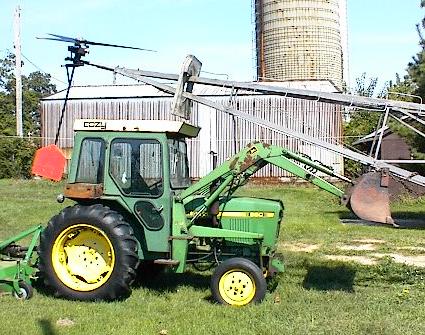
The blades are 6.5 ft diameter and all were installed on a rebuilt aermotor tower. You can see below my little green helper pushes the tower up without any problem. The tower is smaller than I would have liked and came in at 27 ft.
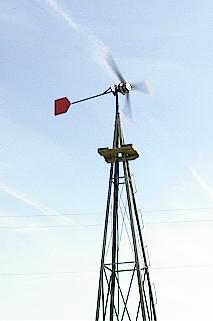
And finally she's up and running.... It does a fairly nice job so far... I've seen 42 amps out of her in a 26 mph wind so far which at the time my batteries were at 13.5 volts which comes in at 567 watts. I expect it will do 600 watts with no problem. I've set the furling at around 28 mph although we haven't experienced winds that high as yet and I haven't had the chance to see if I was correct in my calculations.... I'm sure I'll find out soon enough... UPDATE: A fairly windy day gave the little unit a good exercise. I found that my furling system calculations were off by 4 mph and instead of 28 mph it furls at 32 mph. At 32 mph and partially furled it was making 58.6 amps into my battery bank which was at 13.9 volts at the time or a total of 815 watts. A little better than I had expected, and quite possibly more than I want... I'll be taking a couple pounds off the tail on the next calm day...
The 500 watt alternator kit is available for a limited time... click here for details This alternator will be offered as a kit on the builders corner page email me for details....
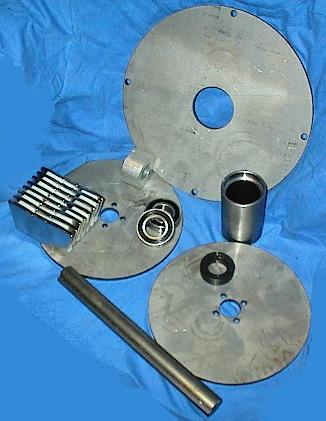
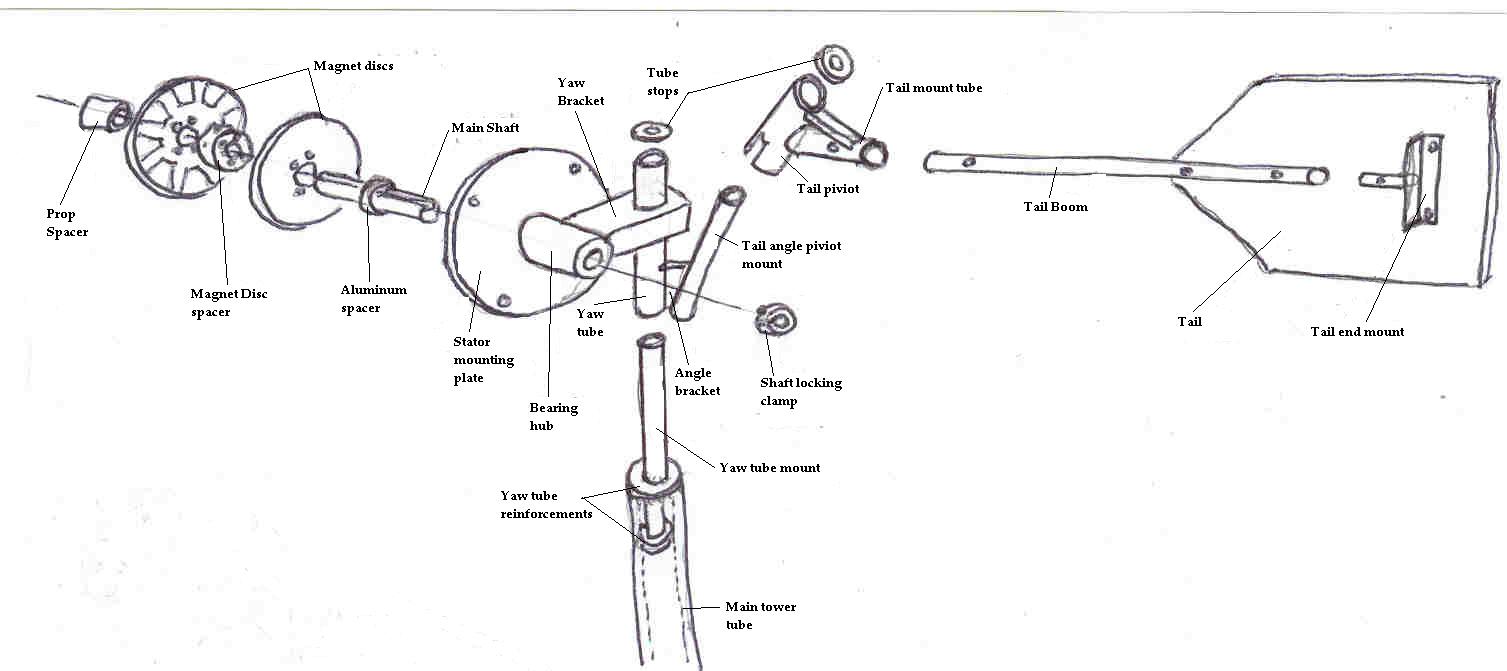
Below shows the basic parts breakdown of the dual rotor turbine without the prop hubs or prop
|